Cocos2dx游戏开发系列笔记18:《跑酷》游戏源码解析(2)
来源:未知 责任编辑:责任编辑 发表时间:2014-01-20 07:52 点击:次
类的存取函数。
骨头稍微明白一点了,以后慢慢理解吧。
骨头稍微明白一点了,以后慢慢理解吧。
在Player.CPP里,有构造方法,create方法。
构造方法主要初始化一些值
create方法主要是创建CCSprite这个主要对象,一些动画和参数的设置在 init 方法里。
主角滑翔方法,也是简单的播放滑翔动画和修改速度。
//设置下降动作
void Player::setFloating (bool value) {
	if (_floating == value)
		return;
	if (value && _hasFloated)
		return;
	_floating = value;
    this->stopAllActions();
	if (value) {
		_hasFloated = true;
        this->setDisplayFrame(CCSpriteFrameCache::sharedSpriteFrameCache()->spriteFrameByName(player_float.png));
        this->runAction(_floatAnimation);
		_vector.y += PLAYER_JUMP * 0.5f;
    } else {
        this->runAction(_rideAnimation);
	}
}
还有void Player::update (float dt) 更新方法:
这里会慢慢的加速到速度最大值,然后匀速。
然后根据玩家的状态,来调整速度,是掉落、前进或者跳跃等等。
速度相关的,很好理解,但是很乱。
void Player::update (float dt) {
	//加速度到最大,然后匀速
	if (_speed + ACCELERATION <= _maxSpeed) {
		_speed += ACCELERATION;
	} else {
		_speed = _maxSpeed;
	}
	_vector.x = _speed;
	//CCLog(play state:%d,_state);
	switch (_state) {
	case kPlayerMoving:
		_vector.y -= GRAVITY;
		if (_hasFloated)
			_hasFloated = false;
		break;
	case kPlayerFalling:
		if (_floating ) {
			_vector.y -= FLOATNG_GRAVITY;
			_vector.x *= FLOATING_FRICTION;
		} else {
			_vector.y -= GRAVITY;
			_vector.x *= AIR_FRICTION;
			_floatingTimer = 0;
		}
		break;
	case kPlayerDying:
		_vector.y -= GRAVITY;
		_vector.x = -_speed;
		this->setPositionX(this->getPositionX() + _vector.x);
		break;
	}
	if (_jumping) {
		_state = kPlayerFalling;
		_vector.y += PLAYER_JUMP * 0.25f;
		if (_vector.y > PLAYER_JUMP )
			_jumping = false;
	}
	if (_vector.y < -TERMINAL_VELOCITY)
		_vector.y = -TERMINAL_VELOCITY;
	_nextPosition.y = this->getPositionY() + _vector.y;
	if (_vector.x * _vector.x < 0.01)
		_vector.x = 0;
	if (_vector.y * _vector.y < 0.01)
		_vector.y = 0;
	if (_floating) {
		_floatingTimer += dt;
		if (_floatingTimer > _floatingTimerMax) {
			_floatingTimer = 0;
			this->setFloating(false);
		}
	}
}
=======================================================================


地图贴砖类:Block
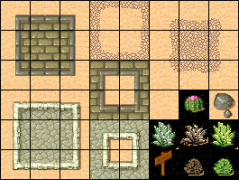
就是左边这种方块,根据一定的顺序,拼成了游戏中的地图。
一般使用地图编辑器,编辑好了导入到游戏中。
以前笔记遇到过,骨头还没学到那,暂时一放。
Block.h 中,有类型枚举、间隔(?)枚举。
定义了贴砖的宽度,高度,贴砖图片,和一些基本的动画,如移动,小时,缩放等。
	CC_SYNTHESIZE(int, _type, Type);

	//声明一个成员变量_puffing以及getfunName函数,没有set函数。getfunName函数的实现要自己做
	CC_SYNTHESIZE_READONLY(bool, _puffing, Puffing);

	//声明成员变量数组:烟囱
	CC_SYNTHESIZE(CCArray *, _chimneys, Chimneys);
相关新闻>>
最新推荐更多>>>
- 发表评论
-
- 最新评论 进入详细评论页>>

![cocos2d_x+lua[2]](/uploads/allimg/131030/110J64609-0-lp.jpg)


