cocos2d-x学习笔记(6)--按钮
cocos2d-x学习笔记(6)--按钮
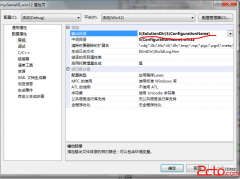
step1:创建一个cocos2d-win32 application,并命名为menu
step2:为了简化代码,我吧HelloWorldScene.cpp中的init()函数中的“Hello World”和背景代码段删除了。同时,为了省去时间,我很简单地做了一些按钮。
在HelloWorldScene.cpp中我修改了init()函数,如下:
[cpp]
bool HelloWorld::init()
{
bool bRet = false;
do
{
//////////////////////////////////////////////////////////////////////////
// super init first
//////////////////////////////////////////////////////////////////////////
CC_BREAK_IF(! CCLayer::init());
//////////////////////////////////////////////////////////////////////////
// add your codes below...
//////////////////////////////////////////////////////////////////////////
// 1. Add a menu item with "X" image, which is clicked to quit the program.
// Create a "close" menu item with close icon, it's an auto release object.
CCMenuItemImage *pCloseItem = CCMenuItemImage::itemFromNormalImage(
"CloseNormal.png",
"CloseSelected.png",
this,
menu_selector(HelloWorld::menuCloseCallback));
CC_BREAK_IF(! pCloseItem);
// Place the menu item bottom-right conner.
pCloseItem->setPosition(ccp(CCDirector::sharedDirector()->getWinSize().width - 20, 20));
// Create a menu with the "close" menu item, it's an auto release object.
CCMenu* pMenu = CCMenu::menuWithItems(pCloseItem, NULL);
pMenu->setPosition(CCPointZero);
CC_BREAK_IF(! pMenu);
// Add the menu to HelloWorld layer as a child layer.
this->addChild(pMenu, 1);
// Get window size and place the label upper.
CCSize size = CCDirector::sharedDirector()->getWinSize();
//用图片来做按钮
CCMenuItemImage* myItems = CCMenuItemImage::itemFromNormalImage(
"normal.png", "down.png",
this,
menu_selector(HelloWorld::myMenuCallback));
CC_BREAK_IF(!myItems);
myItems->setPosition(ccp(size.width/2, size.height - 50));
CCMenu* myMenu = CCMenu::menuWithItems(myItems, NULL);
myMenu->setPosition(CCPointZero);
CC_BREAK_IF(!myMenu);
this->addChild(myMenu, 1);
//用文字来做按钮
CCLabelTTF* pLabel = CCLabelTTF::labelWithString("sceondMenu", "Arial",40);
CCMenuItemLabel* pItemLabel = CCMenuItemLabel::itemWithLabel(pLabel,
this, menu_selector(HelloWorld::secondMenuCallback));
[cpp]
//itemWithLabel中最后一个参数是按钮响应事件,想要定义点击按钮后发生的事,就要在secondMenuCallback响应函数中添加响应代码
CCMenu* pSecondMenu = CCMenu::menuWithItems(pItemLabel, NULL);
pItemLabel->setPosition(ccp(size.width/2, size.height-150));
pSecondMenu->setPosition(CCPointZero);
this->addChild(pSecondMenu, 2);
bRet = true;
} while (0);
return bRet;
}
我们可以发现,虽然添加的按钮类型不同,但步骤还是大同小异的,
首先,定义一个按钮项来装载相应的按钮源(如image图像源、label文字源......),并设置按钮项的位置
然后,定义个按钮类来装载上一步中定义好的按钮项,并设置容按钮容器的位置
最后,添加按钮到背景(Layer)中
同时,在HelloWorldScene.h的类中添加了两个按钮响应函数
[cpp]
void myMenuCallback(CCObject* pSender);
void secondMenuCallback(CCObject* pSender);
在HelloWorldScene.cpp中对应的代码:
[cpp]
void HelloWorld::myMenuCallback(CCObject* pSender)
{
//自己添加响应的事件
}
void HelloWorld::secondMenuCallback(CCObject* pSender)
{
CCScene* scene = CCScene::node();
CCSprite* pSprite = CCSprite::spriteWithFile("HelloWorld.png");
CCSize size = CCDirector::sharedDirector()->getWinSize();
pSprite->setPosition(ccp(size.width/2, size.height/2));
CCLayer* pLayer = CCLayer::node();
pLayer->addChild(pSprite);
scene->addChild(pLayer);
CCDirector::sharedDirector()->replaceScene(scene);
}
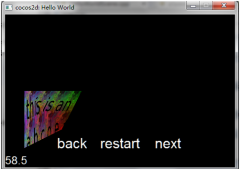
step3:编译运行,可以见到有个按钮,一个是图形按钮(很粗糙),另一个是文字按钮。点击第一个按钮没有任何反应,那时因为我没有在响应事件中添加任何代码,点击第二个按钮后就出现了cocos2d-x的标志性背景。
作者:wen294299195
相关新闻>>
![cocos2d_x+lua[2]](/uploads/allimg/131030/110J64609-0-lp.jpg)
- 发表评论
-
- 最新评论 进入详细评论页>>