iOS第五章控件和动作(2)
- (void)viewDidLoad
{
……
myTextField.delegate= self;
}
(4)取消键盘
- (BOOL)textFieldShouldReturn:(UITextField*)textField
{
[textFieldresignFirstResponder];
returnYES;
}
(5)输入长度判断
- (BOOL)textField:(UITextField *)textFieldshouldChangeCharactersInRange
:(NSRange)rangereplacementString:(NSString *)string
{ intMAX_CHARS = 10;
NSMutableString*newText = [NSMutableString stringWithString: textField.text];
[newTextreplaceCharactersInRange: range withString:string];
return([newText length] <= MAX_CHARS);
}
5、控制控件-按钮 UIButton
创建按钮
------------------------------------------------------------------------------------------------------------------------------
使用 IB 完成:
(1)创建一个 View ,生成三个文件xxxViewController.xib、xxxViewController.h、xxxViewController.m、
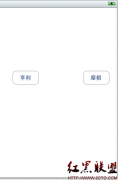
(2)如果使用 图形化工具,打开 xxxViewController.xib ,从“对象库”中拖拽控件到 View 视图中,并通过“属性检查器” 设置按钮属性。
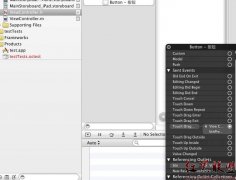
如果需要对按钮进行事件处理,需要在xxx.ViewController.h 文件中创建一个处理按钮事件的 IBAction 方法,并在 IB中,拖线 连接 按钮和IBAction.
- (IBAction)buttonPress:(UIButton *)sender;
对按钮事件的处理一般在 xxxViewController.m 文件中,对应的 IBAction 方法中编写。
- (IBAction)buttonPress:(UIButton *)sender {
//创建一个弹出提示框,
UIAlertView*alert = [[UIAlertViewalloc]
initWithTitle:@"提示标题"
message:@"通过xib实现的按钮处理方法"
delegate:self
cancelButtonTitle:@"OK"
otherButtonTitles: nil];
//显示弹出提示框
[alert show];
}
------------------------------------------------------------------------------------------------------------------------------
(3)如果使用纯代码编写,打开 xxxViewController.h,创建按钮对象作为 @propertity 属性
@property (nonatomic, retain, readonly) UIButton *roundedButtonType;
然后,在 xxxViewController.m 文件中编写代码:
在 - (void)viewDidLoad 方法中编写创建 按钮的代码 如下所示
相关新闻>>
- 发表评论
-
- 最新评论 进入详细评论页>>



![[iPhone中级]iPhone团购信息客户端的开发 (二)](/uploads/allimg/131022/200H11235-0-lp.png)

